



409 files
-
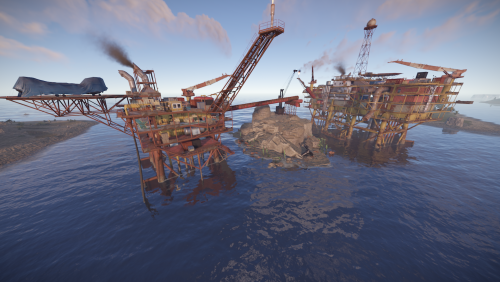
Combined the two oilrigs, to make a more dangerous and exciting adventure of raiding the rigs.
The rigs are connected with some cranes and pipes, simulating a construction site. You can use the pipes to switch between the two oilrigs.
Tweaked the decorations a little and added some ladder triggers.
I have repaired it and have permission to publish it
The Prefab was originally created by Abracadaver
- Free
- 4 Downloads
-
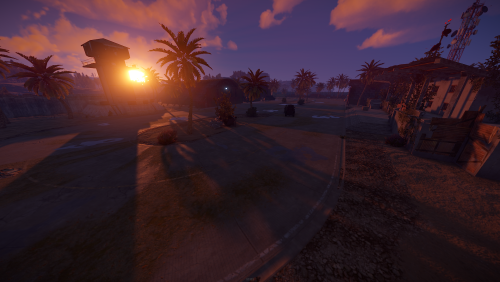
Mini-Airfield is a reconstruction of the Facepunch procedural broken Airfield from @kilgoar but 50% smaller , keeping the original puzzle and deleting extra assets that took space and re-arranging the layout abit.
This is part of a mini-monument series i started and they are perfect for small maps if you want to keep the same procedural monuments but smaller with a twist and extra decor.
Just like normal Airfield this has a Green and Blue keycard puzzle with all the normal loot from Airfield present.
No underground entrance present so you'd have to place your own outside or if you wish it inside just message me and i can make it happen.
If you use plugins for events that use Airfield this might not work and you'd have to use 3rd party plugins like Monument Finder.
Entity count : 1440
Size 1 Grid and a half , normal Airfield is 3 grids +/-.
- $15
- 2 Downloads
-
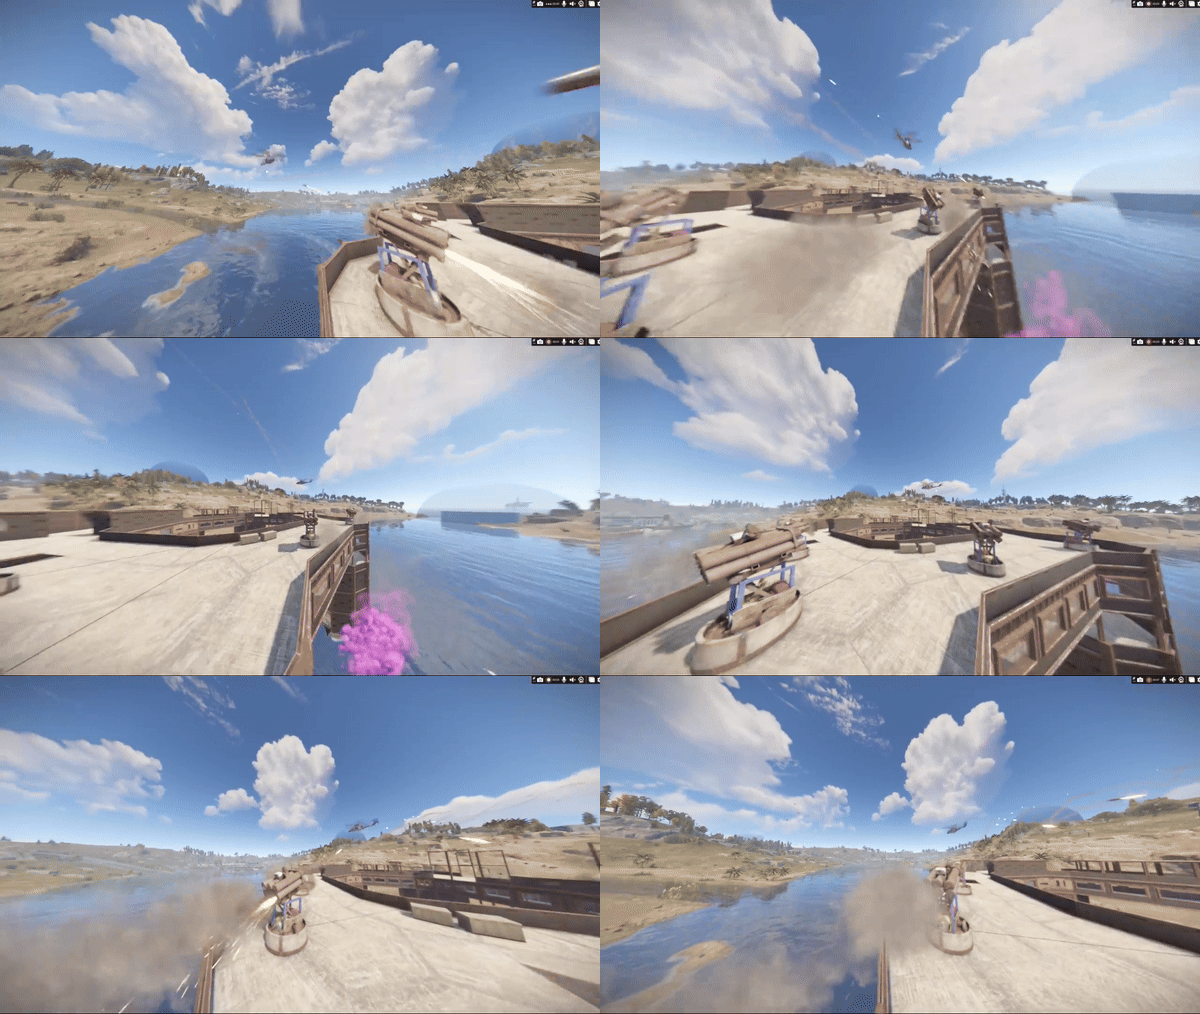
Ever wanted to make SAMSites shoot at the Patrol Helicopter or any other vehicles/entities? Well you can with SAM Site Targets, Config is easy and simple, use https://github.com/OrangeWulf/Rust-Docs/blob/master/Entities.md to find the entities shortprefabname, and change the config and bam!
Notes:
Unfortunately the default targeting vehicles like the minicopter are hardcoded in the samsite code, so if u change the targeting range to under 150 it wont work as the hardcoded value takes over...
If you have the permission set to "", it would make it so all SAMSites attack that entity, bypassing the entity owner check!
Configuration:
{ "Entities": { "attackhelicopter.entity": { "Can be targeted by static SAM Sites?": true, "Enabled": false, "Permission": "samsitetargets.attackhelicopter", "Rocket damage multiplier!": 1.0, "Rocket speed multiplier!": 1.0, "Seconds between rocket bursts!": 5.0, "Targeting range!": 150.0 }, "bradleyapc": { "Can be targeted by static SAM Sites?": true, "Enabled": false, "Permission": "samsitetargets.bradley", "Rocket damage multiplier!": 1.0, "Rocket speed multiplier!": 1.0, "Seconds between rocket bursts!": 5.0, "Targeting range!": 150.0 }, "ch47.entity": { "Can be targeted by static SAM Sites?": true, "Enabled": false, "Permission": "samsitetargets.ch47", "Rocket damage multiplier!": 1.0, "Rocket speed multiplier!": 1.0, "Seconds between rocket bursts!": 5.0, "Targeting range!": 150.0 }, "minicopter.entity": { "Can be targeted by static SAM Sites?": true, "Enabled": false, "Permission": "samsitetargets.minicopter", "Rocket damage multiplier!": 1.0, "Rocket speed multiplier!": 1.0, "Seconds between rocket bursts!": 5.0, "Targeting range!": 150.0 }, "patrolhelicopter": { "Can be targeted by static SAM Sites?": true, "Enabled": false, "Permission": "samsitetargets.patrolheli", "Rocket damage multiplier!": 1.0, "Rocket speed multiplier!": 1.0, "Seconds between rocket bursts!": 5.0, "Targeting range!": 150.0 }, "scraptransporthelicopter": { "Can be targeted by static SAM Sites?": true, "Enabled": false, "Permission": "samsitetargets.scrapheli", "Rocket damage multiplier!": 1.0, "Rocket speed multiplier!": 1.0, "Seconds between rocket bursts!": 5.0, "Targeting range!": 150.0 } } }- $10
- 10 Downloads
-
The Stalker Monuments Bundle consists of 5 unique monuments to place down on your maps and let your players immerse in the atmosphere of S.T.A.L.K.E.R. , surprise your players with those monuments ranging from small to large both above and under ground and give them comfort with the unique safe zone design or let them wonder what's inside the Checkpoints around your maps!
In this bundle you will find :
- $55
- 3 Downloads
-
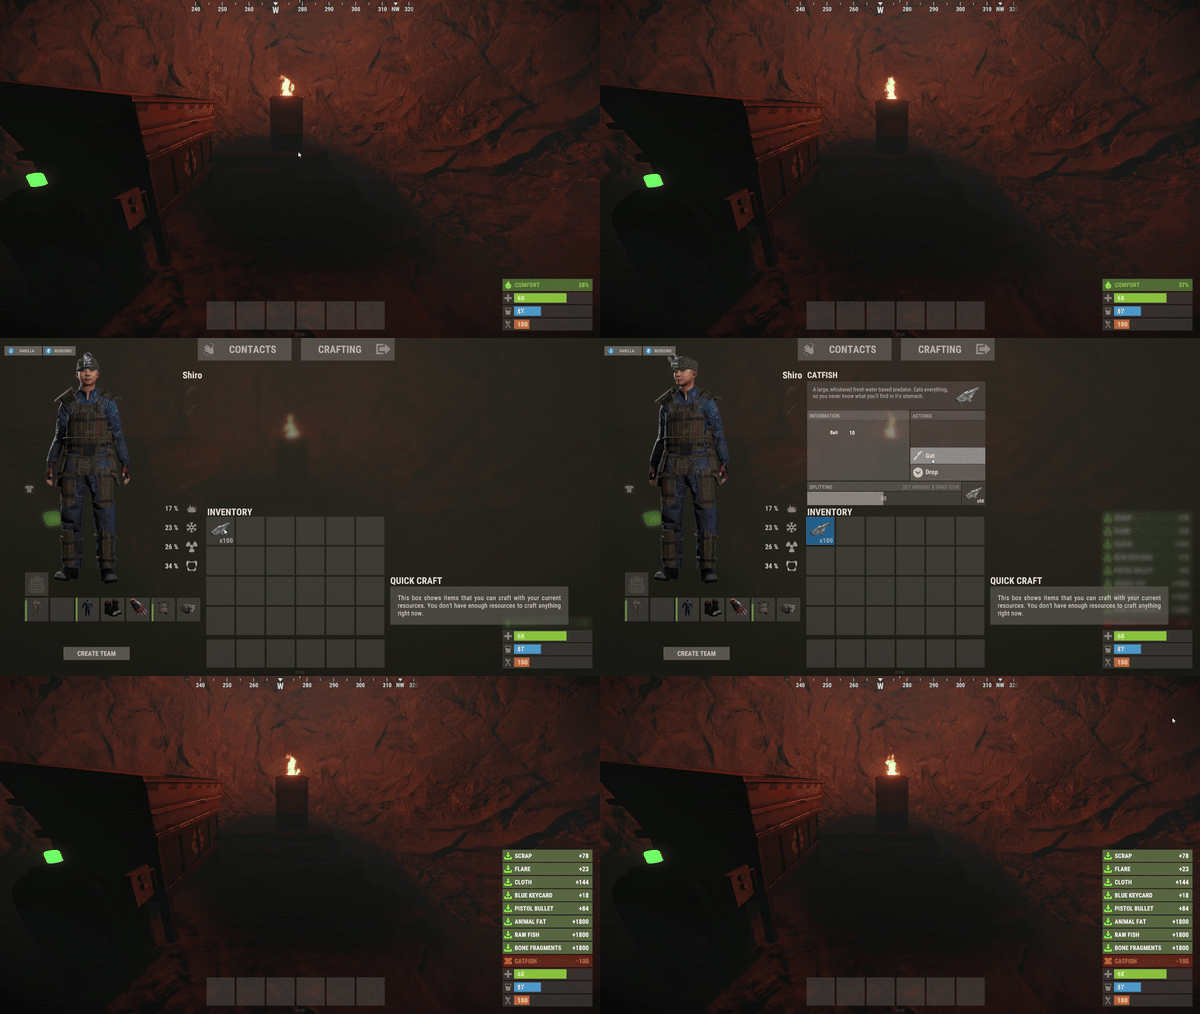
Do you want to make your players lives easier? QuickGut allows your players to gut stacks of fish instantly! Saving time and making them happy!
Plugin is simple and straight forward with no configuration!
Note:
By default quickgut wont be enabled for the player, they ether need to enter the command /gut to enable it or you need to give them the permission quickgut.active when given access... Permissions:
quickgut.use - Allows the player to use the command /gut and allows them to gut fish instantly! quickgut.active - Toggle weather the player has quickgut enabled or not! Commands:
/gut - Toggles the feature on or off!- $5
- 1 Downloads
-
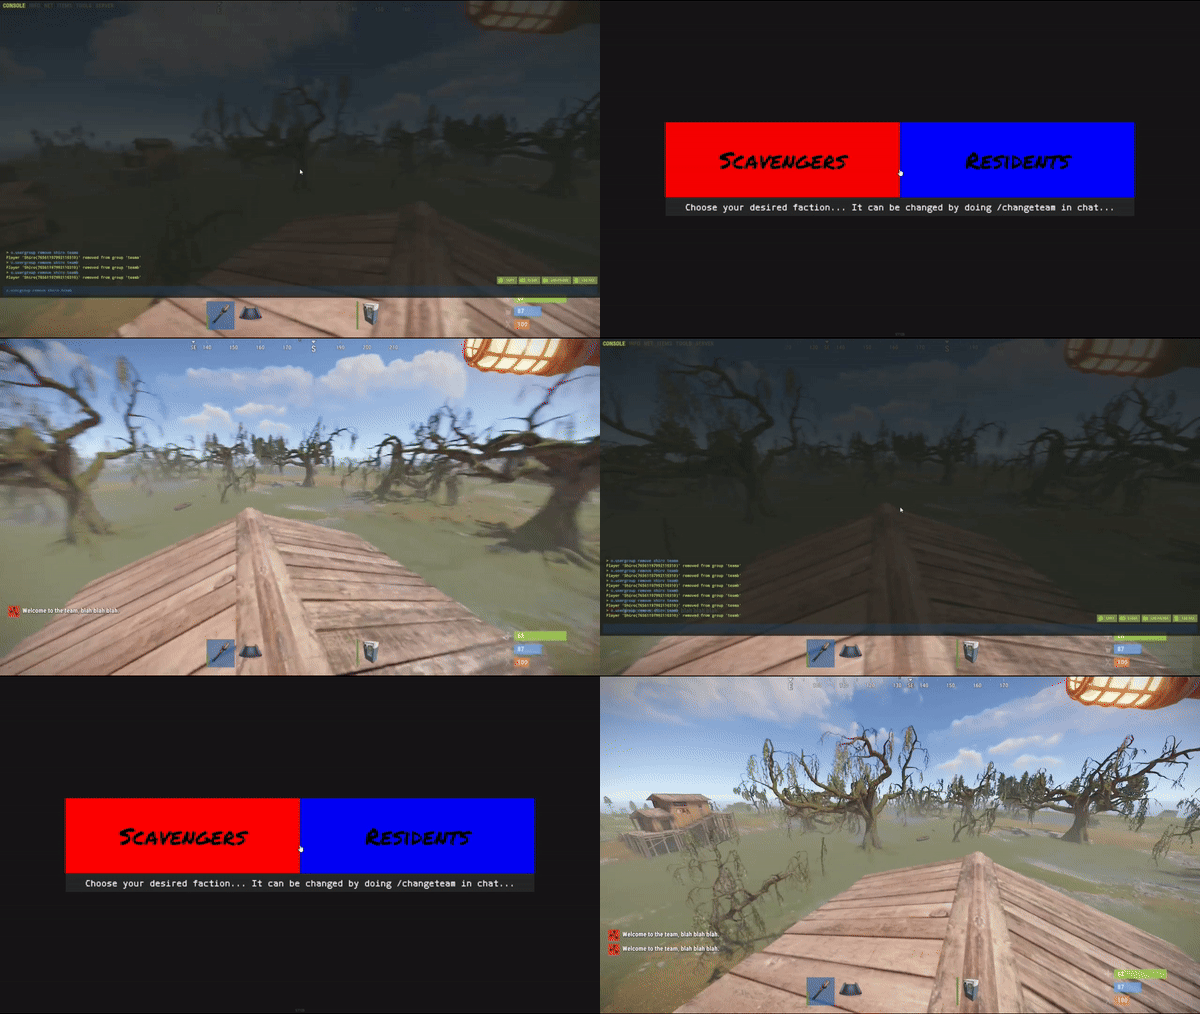
Simple system allows players to choose which team/side/faction or group they want to be in.
On first load you will have to create your own oxide groups for the players to chose from example "Team A/ Team B" you can easily rename those from lang file to example "Scavangers/Residents" or whatever you want.
The purpouse of this plugin is for PVE/Roleplay servers with different types of perks for different types of oxide groups or Event Servers where players can chose their sides.
Permissions:
TeamMenu.change - Allows you to use the command /changeteam Commands:
/changeteam API:
bool ForceChangeTeam (string id) string GetPlayerTeam (string id) string[] GetTeamMembers (string Team) int? GetTeamCount (string Team) Configuration:
{ "onLoad": true, "onAwake": true, "Confirmation_Message": false, "AutoShow_TeamRemoval": true, "TeamA": { "Group": "teama", "Color": "1 0 0 1" }, "TeamB": { "Group": "teamb", "Color": "0 0 1 1" } } Language:
{ "UI_Description": "Choose your desired faction... It can be changed by doing /changeteam in chat...", "Confirmation_Message": "Welcome to the team, blah blah blah.", "TeamA": "TeamA", "TeamB": "TeamB" }
- $5
- 1 Downloads
-
The InLand Building Bundle consists of 5 unique prefabs to place down on your maps and let your players look for them on the map and try find a way to use them properly while building unique base designs!
In this bundle you will find :
- $20
-
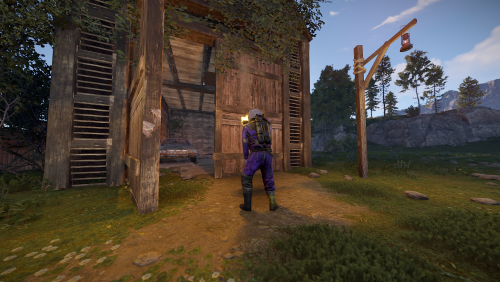
Let your players stumble upon this Abandoned Barn and discover the entrance to a cave system where they can build their bases and hide from enemies.
The main structure consists of ground floor (entrance) with a tool box behind the covers and little space to build foundations for door/s and the ladder leading to the second floor with place to place down storage chests and other items.
Cave system is accessible via the open hole at the back of the barn behind the car and the covers , main cave is a small space for a medium sized base with enough lighting from the ceilling glowing worms and lanterns.
Second cave is accessible via the main cave and it's big enough to fit a large base although there's little to no lighting inside the large cave.
Please keep in mind this is a prefab meant for base build and not a monument so there are no puzzles or loot present except a small toolbox behind the covers on ground floor.
All Masks are present (Alpha,Height,Splat)
Entity Count : 265
- $5
- 1 Downloads
-
Woxide is an Oxide plugin that streamlines the process of integrating your Rust server with your WeOxide Shop.
Designed for server owners who prefer to set up their own payment gateways, Woxide enables you to automate the delivery of in-game purchases without sacrificing control or revenue.
When a player makes a purchase on your website, this plugin will automatically detect the purchase and run the corresponding command in-game, such as adding the player to a VIP group or giving them a special item.
Woxide is the solution for creating a self-managed, profitable Rust server.
🔗 Integration: Woxide is designed to work with your WeOxide Shop, allowing you to set up your own payment gateways, such as PayPal or Stripe. Keep full control over your revenue and eliminate third-party fees.
🛠️ Server-Side Command Automation: Woxide simplifies the process of executing server-side commands for purchased items. Configure the plugin according to your needs, and let it handle the rest.
📥Seamless Purchase Processing: Woxide continuously monitors your WeOxide Shop for new purchases, ensuring that players receive their in-game rewards promptly. The plugin checks the local data file to avoid duplicate processing.
📢In-Game Purchase Acknowledgment: Woxide automatically broadcasts a thank you message in the in-game chat when a purchase is processed, fostering a sense of community and promoting additional sales.
🔧Configuration: Woxide has an easy-to-use configuration, enabling you to tailor the plugin to your server's unique requirements. Check out the documentation for a config example.
Before you start
To access this plugin, it is necessary to use WeOxide Server hosting and have an active server and website.
If you don't have a server yet, you can order one today at https://weoxide.host/server/rust specifically for Rust and start using the plugin.
Installation
Upload the Woxide plugin file to the oxide/plugins directory on your Rust server. Start your Rust server. The Woxide plugin should now be installed and loaded. Start editing the config file based on your products & setup.
Configuration
The Woxide plugin comes with a default configuration file that you can modify to suit your needs. You can find the configuration file at oxide/config/Woxide.json.
The configuration file has the following options:
shopUrl: The URL of your WeOxide Shop. keyLicense: Provided by WeOxide after shop is activated. secLicense: Provided by WeOxide after shop is activated. products: dictionary of product IDs and their corresponding commands. For example, you might have a product with an ID of 123 that adds the player to a VIP group for 30 days. You would add this product to the dictionary like this: "products": { "123": { "command": "oxide.usergroup add {PLAYERNAME} vip", "expires": 30, "expireCommand": "oxide.usergroup remove {PLAYERNAME} vip" } }
In this example, the {PLAYERNAME} placeholder will be replaced with the player's in-game name when the command is run. The expires (optional) option specifies the number of days that the player should remain in the VIP group, and the expireCommand (optional) option specifies the command to run when the player's VIP status expires.
You can add as many products to the dictionary as you like.
It is important to include {PLAYERNAME} in the command to ensure that the group or item is given to the correct player who made the purchase.
Example config file
This is an example configuration file. You can use this as a template and modify the values to match your own products and setup.
To use this example configuration, simply copy and paste the code into your Woxide configuration file and save it.
Make sure to replace the values for shopUrl, keyLicense, and secLicense with your own values. The products section defines the products that are available for purchase on your shop, and the corresponding commands to run in-game.
You can add, remove, or modify these products to fit your needs.
{ "shopUrl": "example.weoxiders.net", "keyLicense": "PROVIDED_BY_WEOXIDE_AFTER_ACTIVATION", "secLicense": "PROVIDED_BY_WEOXIDE_AFTER_ACTIVATION", "products": { "366": { "command": "oxide.usergroup add {PLAYERNAME} vip", "expires": 30, "expireCommand": "oxide.usergroup remove {PLAYERNAME} vip" }, "358": { "command": "oxide.usergroup add {PLAYERNAME} vip", "expires": 30, "expireCommand": "oxide.usergroup remove {PLAYERNAME} vip" }, "169": { "command": "inventory.giveto {PLAYERNAME} electric.generator.small 1", "expires": 1 } } } Notice on config file
It is strongly recommend to add "1" on expires on in-game items purchases, shown as above in the example.
In case of a data file loss, it would not run the command again the on the server by mistake.
Commands
The Woxide Shop plugin provides the following console commands:
woxide.check: Manually checks for new orders and fulfills them. woxide.stop: Stops the automatic order checking. woxide.start: Starts the automatic order checking. woxide.test: Tests the connection to the shop.
Permissions
The Woxide Shop plugin provides the following permission:
woxide.use: Allows the player to use the /woxide.check in-game command.
Stuff to avoid
A small list of stuff you should not do:
Under no circumstances should you delete the data file located in oxide/data/Woxide while wiping the server. This file records all purchases locally on your Oxide server. It is recommended to create a backup of all files before making any significant changes to your server.
Please avoid (or do not) modifying the order checking frequency in the Woxide.cs file. If necessary, any changes should be thoroughly tested to ensure compatibility with the shop. By default, the plugin checks orders every 90 seconds (1.5 minutes), which is suitable for most scenarios.
- $8
- 1 Downloads
-
A simple website template that can be easily installed by adding the zip file to your website's root directory and unzipping it!
Demo : https://template7.weoxiders.net
All changes can be done from index.php
To enable live data from your server to the website add your API Key from rust-servers.net here
If you wish to have more than 1 server just copy the first 14 lines and paste below and adjust data1/players1 with the number of servers you adding be it 2 or 3 or more.
To change the youtube videos you just go on youtube and press share as embed and copy the link similar to this and replace it on the server you edit for
If you have any questions or require help to configure it do not hesitate to contact me here or on discord!
If you want a pre-made website check out our hosting https://weoxide.host and check our website builder page!
- $25
- 17 Downloads