Download Statistics
- 623 Files
- 68 Comments
- 46 Reviews
-
Plugins
62 files
-
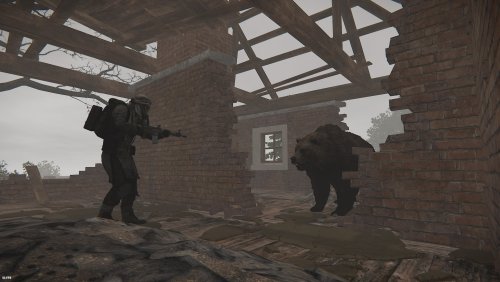
Notify Addon that will popup the notification when killing animals.
Features :
works with both the Notify versions. lightweight Simple config Animal naming can be changed through language file. Permission system Option through config to use any Notify profile (can create profiles) Supported Animals :
Bear Polarbear Boar Chicken Horse (Wild horse) Stag Wolf Wolf2 (new wolf AI) Zombie (minecraft) Simpleshark (Shark) Permissions :
notifyanimalfeed.use : Grant user permission to see the feed Configuration :
{ "Notify profile ID": 0 } Localisation :
{Killer} : Player name will be displayed on this location {Victim} : Animal name will be displayed on this location (can be customised in language file) {Weapon} : Weapon/explosives/traps/fire will be displayed on this location {_Distance} : Distance between animal and player will be displayed here Make sure to use all 4 when changing the language file text including brackets.
{ "FeedAnimal": "<color=orange>{Killer}</color> killed a <color=yellow>{Victim}</color> with a <color=yellow>{Weapon}</color> from <color=yellow>{_Distance}</color>m", "Bear": "Bear", "PolarBear": "Polar Bear", "Boar": "Pig", "Chicken": "Chicken", "Horse": "Wild Horse", "Stag": "Stag", "Wolf": "Wolf", "SimpleShark": "Shark" }
- Free
- 13 Downloads
-
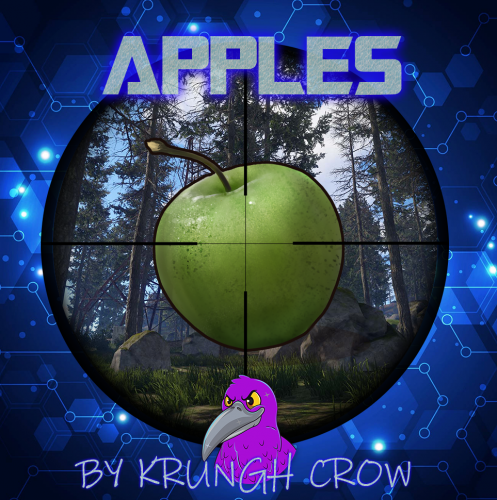
At a configurable rate and amount setting , apple(s) can fall from a tree making it a little less hard to find food
Features :
Drops a set amount of apples after cutting down trees Set the droprates (0 to 1) ea 0.25 would be 25% chance Simple configuration Permissions Debug option for console logging Permissions :
apples.drop : To give the player the chance to find the apples Configuration :
{ "Main config": { "Debug": true, "Chat Steam64ID": 0, "Chat Prefix": "[<color=orange>Apples</color>] : " }, "Dropchance (0-1)": 1.0, "Min apples": 1, "Max apples": 3, "Put in Inventory (true/false)": true, "Excluded Tree Prefabs (full paths)": [ "assets/bundled/prefabs/autospawn/resource/wood_log_pile/wood-pile.prefab" ] } Localisation :
{ "Applesdrop": "{0} Apple(s) fell from the tree" }- Free
- 24 Downloads
-
Ever wanted to make SAMSites shoot at the Patrol Helicopter or any other vehicles/entities? Well you can with SAM Site Targets, Config is easy and simple, use https://github.com/OrangeWulf/Rust-Docs/blob/master/Entities.md to find the entities shortprefabname, and change the config and bam!
Notes:
Unfortunately the default targeting vehicles like the minicopter are hardcoded in the samsite code, so if u change the targeting range to under 150 it wont work as the hardcoded value takes over...
If you have the permission set to "", it would make it so all SAMSites attack that entity, bypassing the entity owner check!
Configuration:
{ "Entities": { "attackhelicopter.entity": { "Can be targeted by static SAM Sites?": true, "Enabled": false, "Permission": "samsitetargets.attackhelicopter", "Rocket damage multiplier!": 1.0, "Rocket speed multiplier!": 1.0, "Seconds between rocket bursts!": 5.0, "Targeting range!": 150.0 }, "bradleyapc": { "Can be targeted by static SAM Sites?": true, "Enabled": false, "Permission": "samsitetargets.bradley", "Rocket damage multiplier!": 1.0, "Rocket speed multiplier!": 1.0, "Seconds between rocket bursts!": 5.0, "Targeting range!": 150.0 }, "ch47.entity": { "Can be targeted by static SAM Sites?": true, "Enabled": false, "Permission": "samsitetargets.ch47", "Rocket damage multiplier!": 1.0, "Rocket speed multiplier!": 1.0, "Seconds between rocket bursts!": 5.0, "Targeting range!": 150.0 }, "minicopter.entity": { "Can be targeted by static SAM Sites?": true, "Enabled": false, "Permission": "samsitetargets.minicopter", "Rocket damage multiplier!": 1.0, "Rocket speed multiplier!": 1.0, "Seconds between rocket bursts!": 5.0, "Targeting range!": 150.0 }, "patrolhelicopter": { "Can be targeted by static SAM Sites?": true, "Enabled": false, "Permission": "samsitetargets.patrolheli", "Rocket damage multiplier!": 1.0, "Rocket speed multiplier!": 1.0, "Seconds between rocket bursts!": 5.0, "Targeting range!": 150.0 }, "scraptransporthelicopter": { "Can be targeted by static SAM Sites?": true, "Enabled": false, "Permission": "samsitetargets.scrapheli", "Rocket damage multiplier!": 1.0, "Rocket speed multiplier!": 1.0, "Seconds between rocket bursts!": 5.0, "Targeting range!": 150.0 } } }- $10
- 8 Downloads
-
Do you want to make your players lives easier? QuickGut allows your players to gut stacks of fish instantly! Saving time and making them happy!
Plugin is simple and straight forward with no configuration!
Note:
By default quickgut wont be enabled for the player, they ether need to enter the command /gut to enable it or you need to give them the permission quickgut.active when given access... Permissions:
quickgut.use - Allows the player to use the command /gut and allows them to gut fish instantly! quickgut.active - Toggle weather the player has quickgut enabled or not! Commands:
/gut - Toggles the feature on or off!- $5
- 1 Downloads
-
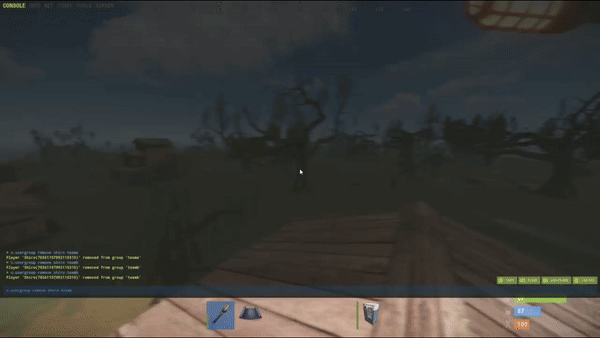
Simple system allows players to choose which team/side/faction or group they want to be in.
On first load you will have to create your own oxide groups for the players to chose from example "Team A/ Team B" you can easily rename those from lang file to example "Scavangers/Residents" or whatever you want.
The purpouse of this plugin is for PVE/Roleplay servers with different types of perks for different types of oxide groups or Event Servers where players can chose their sides.
Permissions:
TeamMenu.change - Allows you to use the command /changeteam Commands:
/changeteam API:
bool ForceChangeTeam (string id) string GetPlayerTeam (string id) string[] GetTeamMembers (string Team) int? GetTeamCount (string Team) Configuration:
{ "onLoad": true, "onAwake": true, "Confirmation_Message": false, "AutoShow_TeamRemoval": true, "TeamA": { "Group": "teama", "Color": "1 0 0 1" }, "TeamB": { "Group": "teamb", "Color": "0 0 1 1" } } Language:
{ "UI_Description": "Choose your desired faction... It can be changed by doing /changeteam in chat...", "Confirmation_Message": "Welcome to the team, blah blah blah.", "TeamA": "TeamA", "TeamB": "TeamB" }
- $5
- 1 Downloads
-
GFVoter it's a voting rewards system for Rust servers listed on GamesFinder.net.
It's designed to reward players for voting for your server/s on gamesfinder.net and players earn points by doing so which they can then redeem for in-game rewards.
What is GamesFinder.net? It's a new platform designed for server owners to list and describe their servers better with more options and gives the players the ability to search for a server easier tailored to their needs and get rewards by voting the server.
Features:
Vote Tracking: Players can vote for the server on the website, and their votes are tracked. Rewards: Players can exchange their accumulated points for rewards. Rewards can be items and executed commands or kits. Cooldown Management: Ensures players can't spam vote claims by implementing a cooldown system. Vote Verification: Checks if a player has voted and then claims their reward via the API. Custom Commands: Players can check their points, claim rewards, or view available rewards through chat commands. Discord Integration: Option to send notifications to a Discord server when a vote is made or a reward is claimed. Commands :
gfvote "Amount" "PlayerName or SteamID" : Allows admins to manually add points to players (Console Command). /claimpoint or /clp : Used by players to claim their voting points. /rewardlist or /rl : Displays available rewards to players. /claimreward or /cr : Players use this to claim a specific reward. /checkpoints or /checkp : Check the amount of points earned. Config Example :
{ "Use discord webhook at vote": true, "Use discord webhook at claim": true, "Discord webhook": "Your discord server webhook", "Chat command to claim reward point": [ "claimpoint", "clp" ], "Chat command for check rewards": [ "rewardlist", "rl" ], "Chat command for get reward": [ "claimreward", "cr" ], "Chat commands for checking points": [ "checkpoints", "checkp" ], "GamesFinder API": "Your API from gamesfinder.net", "Rewards": { "economics": { "Display name for chat (if empty - use key or item name)": "x50 Economics", "NeedPoints": 3, "Type": 1, "Item": null, "Command (%STEAMID% - player user id)": "deposit %STEAMID% 50" }, "group": { "Display name for chat (if empty - use key or item name)": "x1 Group 'Member'", "NeedPoints": 10, "Type": 1, "Item": null, "Command (%STEAMID% - player user id)": "oxide.grant user %STEAMID% (Permission)" }, "sr": { "Display name for chat (if empty - use key or item name)": "x10 ServerRewards", "NeedPoints": 2, "Type": 1, "Item": null, "Command (%STEAMID% - player user id)": "sr add %STEAMID% 10" }, "wood": { "Display name for chat (if empty - use key or item name)": null, "NeedPoints": 1, "Type": 0, "Item": { "Shortname": "wood", "Amount": 1000, "SkinID": 0 }, "Command (%STEAMID% - player user id)": null } }, "Reminder message": "Hey! Don't forget to vote for our server on gamesfinder.net and claim your points.", "Reminder interval minutes": 15 }
- Free
- 8 Downloads
-
This plugin creates NPC on Rust monuments.
This plugin works with new intelligence for NPC.
The plugin has many settings for creating NPC of any type of complexity.
For each NPC separately, it is possible to customize different clothes, weapons, loot.
You can use additional plugins such as: Kits, MarkerManager.
For the issuance of NPS kits. Kits plugin from https://umod.org.
You can add a marker for the NPC. MarkerManager plugin from https://umod.org
[ spawnnpc.command ] - Permission to use chat commands
command to chat
[ /npc count ] - Shows how many NPC are on the map.
[ /npc kill ] - Kill all NPCs on the map.
[ /npc respawn ] - Respawn all NPC on the map.
[ /npc reload ] - Reload plugin.
Weapon advice for the Scarecrow
For melee weapons for example (knife.combat, pitchfork, salvaged.cleaver, machete) and other things that pierce or cut.
Weapon advice for the Scientist
For ranged weapons for example (pistol.revolver, smg.2, rifle.lr300, lmg.m249) and other things that shoot.
- Free
- 1,338 Downloads
- 17 Comments
-
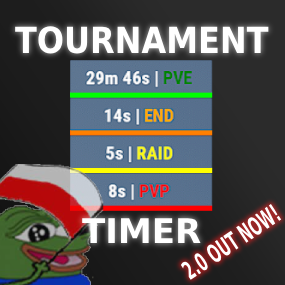
About Tournament Timer
Simple tournament plugin with UI that has four game modes: PVE, PVP, RAID and END.
YT SHOWCASE:
PVE_TIME = 0 PVP_TIME = 30 RAID_TIME = 120 END_TIME = 300
Permissions:
TimerPlugin.use TimerPlugin.status
Chat commands:
"/start" - starts the timer. "/stop" - stops the timer, resets the time and game mode. "/status" - displays information about the current game mode and time.- $15
- 1 Downloads
-
Plugins disable the Torch Damage Globaly.
No Damage on Player used Torch and no damage on Torch Holders from the new DLC.
No Config File. Plug & Play
- Free
- 13 Downloads
-
Simple plugin that protects player's crops from being stolen by checking if the player is authorized on the TC!
Permissions:
privatecrops.message.bypass privatecrops.protection.bypass Language:
{ "message": "<color=red>You are not allowed to steal other players crops!</color>" }- Free
- 22 Downloads
- 1 Comments
-
Blocks the use of certain tools on gather of flesh, trees, ore!
Permissions:
toolblocker.bypass Configuration:
{ "corpses": [ "knife.bone", "knife.combat" ], "nodes": [ "stone.pickaxe", "pickaxe", "icepick.salvaged" ], "trees": [ "stonehatchet", "hatchet", "axe.salvaged" ] } Language:
{ "Blocked": "You are not allowed to use a {0} to gather {1}!" }- Free
- 4 Downloads
-
Have you ever had players steel from other players horses and cant just catch em? This plugin logs items being taken and added to a horses storage, so you can catch horse looters!
Permissions:
horselogger.use Commands:
/horseid - While looking at a horse, it returns the horses ID which would be used to find the log file!- Free
- 6 Downloads
-
Want to make your server a tad bit more realistic, welcome StationaryCrafting, it makes it so players can only craft if they are next to a workbench, if not crafting is not possible or cancels out...
Permission:
stationarycrafting.use Configuration:
{ "ShowMessages": false } Localization:
{ "inofrange": "Stay in the workbench radius, or your crafting queue will be canceled!", "outofrange": "You cannot craft if you are not in the workbench radius!", "canceled": "You have left the workbench radius so your crafting queue was canceled!" }
- Free
- 9 Downloads
-
Allows you to link the effects plugin https://weoxide.net/index.php?/file/275-effects/ with the https://codefling.com/plugins/cooking so when you eat a certain food, you can run effects like vomit! Modify the config to the recopies.
Notes:
Effects: Vomit, Blur, Lick, Breathe, Shake Configuration:
{ "Recipes": { "hamburger": { "vomit": { "Enabled": true, "InstantEffect": true, "LengthIsBuffDuration": true, "EffectLengthInSeconds": 60, "EffectInterval": 3.0 }, "lick": { "Enabled": true, "InstantEffect": true, "LengthIsBuffDuration": true, "EffectLengthInSeconds": 60, "EffectInterval": 4.0 }, "breathe": { "Enabled": true, "InstantEffect": true, "LengthIsBuffDuration": true, "EffectLengthInSeconds": 60, "EffectInterval": 2.0 }, "shake": { "Enabled": true, "InstantEffect": true, "LengthIsBuffDuration": true, "EffectLengthInSeconds": 60, "EffectInterval": 3.0 }, "blur": { "Enabled": true, "InstantEffect": true, "LengthIsBuffDuration": true, "EnableFlashing": true, "StaticBlurOpacity": 0.5, "FlashingBlurOpacity": 0.3, "EffectLengthInSeconds": 60, "EffectInterval": 0.5 } } } }
- Free
- 0 Downloads
-
Ever wanted to know how many sleepers are on your server? With this plugin u can!
Permissions:
sleepercount.use - Gives the player access to the command! Commands:
/sleepers - Returns the total number of sleepers that are in the server! Localization:
{ "none": "There are currently no sleepers on the server!", "single": "There is {0} sleeping player!", "multiple": "There are {0} sleeping players!", "denied": "You don't have permission to use that command!" }- Free
- 13 Downloads
-
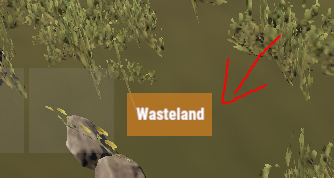
Simple plugin that shows a small UI indicating what zone you are in, It is highly configurable and easy!
Notes:
ZoneManager is required! The text of the zone would be configured in the zonemanager plugins datafile under the name parameter! AlwaysShow - Means that the UI will always be shown weather there is a zone or not! UseWhitelist - True means that it will only show zones that are in the Whitelist! ZoneUISettings - Allows you to add custom UI settings for a zone, If there is none for that zone it results back to the default setting! Permissions:
zoneindicator.use - Shows the UI zoneindicator.import - Allows that player to run the command zindicator_import! Commands:
/zindicator_import - Imports all your zones from ZoneManager Configuration:
{ "AlwaysShow": true, "TextPlaceholder": "Wasteland", "DefaultUI": { "AnchorMin": "0.5 0", "AnchorMax": "0.5 0", "OffsetMin": "190 30", "OffsetMax": "250 60", "FadeSpeed": 0.25, "Color_Background": "0.8 0.5 0.1 0.8", "Color_Text": "1 1 1 1", "TextSize": 12 }, "UseWhitelist": false, "Whitelist": [ "11423859", "25094303" ], "ZoneUISettings": { "11423859": { "AnchorMin": "0.5 0", "AnchorMax": "0.5 0", "OffsetMin": "190 30", "OffsetMax": "250 60", "FadeSpeed": 0.25, "Color_Background": "0.8 0.5 0.1 0.8", "Color_Text": "1 1 1 1", "TextSize": 12 }, "25094303": { "AnchorMin": "0.5 0", "AnchorMax": "0.5 0", "OffsetMin": "190 30", "OffsetMax": "250 60", "FadeSpeed": 0.25, "Color_Background": "0.8 0.5 0.1 0.8", "Color_Text": "1 1 1 1", "TextSize": 12 } } }
- $10
- 7 Downloads
-
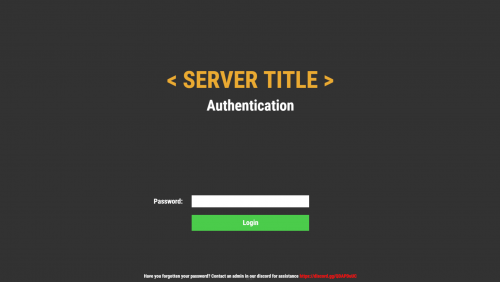
Simple but beautiful user authentication system! Protect your players with a simple authentication system. A password comes a long way! Use a database or local datafile, as it is up to you! With so many features and options to customize! I guarantee you would be satisfied!
Note:
Passwords are now SHA256 Hashed, I have decided to not salt the hashes for the simple reason, if the server or database was breached, the hacker would have access to the salt one way or another, and once they have the salt its pointless! I was thinking of using the players steamid as salt but again, a hacker is not that dumb to not take a look at the plugin to figure it out.
Database table will auto generate if it does not exist!
["UI", "Input", "Secure"] Show/Hide password in the input field
IPAutoAuth - if you logged in previously by the same ip, the login screen will not show up! KeepAuthOnDisconnect overrides if enabled!
Permissions:
userauth.bypass - Bypass the authentication/registration process!
userauth.resetpass - Permission to use the command /resetpass
userauth.movementbypass - Bypass movement lock!
Commands:
/resetpass <steamid> - Resets the given players password, if they are connected registration process would initialize!
Configuration:
{ "DB": { "DB_Host": "localhost", "DB_Name": "userauth", "DB_Password": "", "DB_Port": "3306", "DB_Username": "root", "UseDatabase": false }, "Freeze": { "DisableChat": true, "DisableChatCommands": true, "DisableConsoleCommands": true, "DisableMovement": true, "DisableVoice": true }, "IPAutoAuth": false, "KeepAuthOnDisconnect": false, "Kick": { "Enable_FailedLoginKick": true, "Enable_TimedKick": true, "FailedLoginKickTimes": 3, "TimedKickInSeconds": 60 }, "UI": { "Background_Color": "0.2 0.2 0.2 1", "Button": { "Background_Color": "0.3 0.8 0.3 1", "Text_Color": "1 1 1 1", "Text_Size": 18 }, "Footer": { "Text_Color": "1 1 1 1", "Text_Size": 12 }, "Header": { "Text_Color": "1 1 1 1", "Text_Size": 38 }, "Input": { "Max_Length": 32, "Secure": true }, "Title": { "Text_Color": "0.92 0.67 0.2 1", "Text_Size": 60 } } }
Language:
{ "UI_Title": "< SERVER TITLE >", "UI_Authentication_Header": "Authentication", "UI_Authentication_Button": "Login", "UI_Authentication_Footer": "Have you forgotten your password? Contact an admin in our discord for assistance <color=red>https://discord.gg/QDAPDuUC</color>", "UI_Registration_Header": "Registration", "UI_Registration_Button": "Register", "UI_Registration_Footer": "Do you need some assistance? Contact an admin in our discord for assistance <color=red>https://discord.gg/QDAPDuUC</color>", "Authentication_Kick_Reason": "You did not login in time!", "Registration_Kick_Reason": "You did not register in time!", "Failed_Login_Reason": "You have entered your password wrong a number of times!", "Error_UI_Bad_Password": "Please try again, You have {0} tries left!", "Error_UI_Empty_Password": "No password was provided, please enter a password!", "NoInput": "No input was provided!", "ParseError": "Could not parse input, try again!", "CommandComplete": "Command has been executed successfully!" }
Planned features:
Ability to change password!
Ability to lock registrations!
Ability to protect players when they are locked! "Godmode"
Command whitelist!
Little text recommending that people use a secure/unique password
- $20
- 4 Downloads
-
Run effects on players or yourself! The plugins is primarily used as an API for other plugins like https://weoxide.net/index.php?/file/274-cookingeffectswrapper/
If you want other effects, message me and i can add them :)
Permissions:
effects.use Commands:
/vomit <optional playername> /blur <optional playername> /shake <optional playername> /breathe <optional playername> /lick <optional playername> /killeffects <optional playername> Config:
{ "Effects": { "vomit": { "Enabled": true, "InstantEffect": true, "EffectLengthInSeconds": 60, "EffectInterval": 6 }, "lick": { "Enabled": true, "InstantEffect": true, "EffectLengthInSeconds": 60, "EffectInterval": 6 }, "breathe": { "Enabled": true, "InstantEffect": true, "EffectLengthInSeconds": 60, "EffectInterval": 6 }, "shake": { "Enabled": true, "InstantEffect": true, "EffectLengthInSeconds": 60, "EffectInterval": 6 }, "blur": { "Enabled": true, "InstantEffect": true, "EnableFlashing": true, "StaticBlurOpacity": 0.5, "FlashingBlurOpacity": 0.3, "EffectLengthInSeconds": 60, "EffectInterval": 6 } } } Hooks:
void EffectVomit(BasePlayer Player, int Length, float Interval, bool Instant) void EffectShake(BasePlayer Player, int Length, float Interval, bool Instant) void EffectBlur(BasePlayer Player, int Length, float Interval, bool Instant, bool Flashing) void EffectLick(BasePlayer Player, int Length, float Interval, bool Instant) void EffectBreathe(BasePlayer Player, int Length, float Interval, bool Instant)- $10
-
Make custom commands, custom crafts, etc! Enter a command and it checks if you got the stuff and the correct amount and executes the configured command!
Notes:
If Permission or Message is not set aka "" then they will be skipped! Configuration:
{ "Commands": { "firebullets": { "ExecuteCommand": "giveto {1} ammo.rifle.incendiary 64", "Permission": "firebullets", "Message": "Enjoy the fire bullets!", "TakeItems": true, "Items": [ { "Shortname": "ammo.rifle", "Amount": 64 }, { "Shortname": "lowgradefuel", "Amount": 32 } ] } } }
- $5
- 2 Downloads
-
Magic Poncho is an item with a custom skin and additional abilities to farm more resources in the game.
Poncho is slightly visible in the dark.
The plugin provides the ability to customize which item needs to be increased when collecting or farming resources.
The plugin provides the ability to smelt the extracted resources.
Ponchos can be repaired because ponchos lose their durability when farmed.
The plugin provides the ability to craft a poncho.
It is possible to issue an item through the server console, a command in the chat, or through another plugin.
In order for players to find the item, there are settings for item spawning in loot boxes.
Permission Smelting = magicponcho.smelting
Permission Craft=magicponcho.craft
chat command.
Enable/disable smelting = smelting
Item craft=craftponcho
console command.
Give item to player = giveponcho SteamID
To issue a poncho through another plugin, use.
Identifier item skin = 2806678960
Item shortname = attire.hide.poncho
Item name = Magic military poncho
Default config file.
{ "Global settings": { "Item name": "Magic militari poncho", "How fast the item breaks (by default, the item has 250 HP)": 1.0, "Enable smelting of mined resources": false, "Enable crafting poncho": false, "Enable spawn for poncho in loot boxes": false }, "Multiplier settings": { "Item list (item shortname : multiplier)": { "wood": 2.0, "stones": 2.0, "sulfur.ore": 2.0, "metal.ore": 2.0, "hq.metal.ore": 2.0, "leather": 2.0, "bone.fragments": 2.0, "fat.animal": 2.0, "cloth": 2.0, "bearmeat": 2.0, "meat.boar": 2.0, "horsemeat.raw": 2.0, "deermeat.raw": 2.0, "wolfmeat.raw": 2.0, "chicken.raw": 2.0, "cactusflesh": 2.0, "mushroom": 2.0, "potato": 2.0, "seed.potato": 2.0, "seed.hemp": 2.0, "pumpkin": 2.0, "seed.pumpkin": 2.0, "corn": 2.0, "seed.corn": 2.0, "yellow.berry": 2.0, "seed.yellow.berry": 2.0, "green.berry": 2.0, "seed.green.berry": 2.0, "red.berry": 2.0, "seed.red.berry": 2.0, "blue.berry": 2.0, "seed.blue.berry": 2.0, "black.berry": 2.0, "seed.black.berry": 2.0, "white.berry": 2.0, "seed.white.berry": 2.0 } }, "Crafting settings": { "Cost of manufacturing poncho": { "scrap": 250, "leather": 10, "sewingkit": 1 } }, "Spawn settings": { "What crates can contain ponchos (item shortname : chance drop)": { "bradley_crate": 25, "heli_crate": 25 } } }
- $3
- 1 Downloads
-
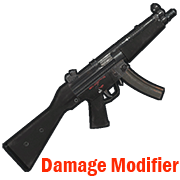
Modifies the damage from your weapon.
Permission = "weapondamagemodifier.use";
Some weapons have already been added to the config file for example.
You can edit the list to your liking by adding or removing weapons from the list.
How to find out the shortname of a weapon?
Enable debugging in the config file.
"Default: what weapon the player is using, what damage was received from this weapon.": true,
"Modifier: what weapon the player is using, what damage was received from this weapon.": true
Reload the plugin.
Choose an active weapon for your character, and deal damage to the entity.
Information will be displayed to you in the server console.
"Hit Info (Initiator - who did the damage). Weapon (ShortName - what weapon). Damage (Total - what was the damage)."
Copy the name of the weapon and add it to the list in your config file.
Save the config file.
Reload the plugin.
Default config file.
{ "Debag settings": { "Default: what weapon the player is using, what damage was received from this weapon.": true, "Modifier: what weapon the player is using, what damage was received from this weapon.": true }, "Multiplier settings": { "Weapon list (weapon shortname : multiplier)": { "explosive.timed.deployed": 1.0, "explosive.satchel.deployed": 1.0, "grenade.beancan.deployed": 1.0, "grenade.f1.deployed": 1.0, "rocket_basic": 1.0, "rocket_hv": 1.0, "rocket_fire": 1.0, "mp5.entity": 1.0, "thompson.entity": 1.0, "m92.entity": 1.0, "bolt_rifle.entity": 1.0, "l96.entity": 1.0, "m39.entity": 1.0 } } }
- $2
- 10 Downloads
-
Connecting to your server using the specified Steam ID.
Good for testing a server, or for a group of friends who need privacy.
Just add a Steam ID to the config file and you will be able to connect to the server.
Default config file.
{ "Connect [SteamID]": [ "*****************", "*****************" ] }
- Free
- 13 Downloads
-
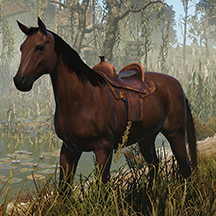
Maybe someday you need to cure your horse?
Then this plugin is for you.
Take the medical syringe and walk close to the horse and press the right mouse button.
1 medical syringe will restore 25 HP for a horse.
Permission "horsetreatment.use"
Configuration file.
{ "Settings": { "Horse Life Recovery Quantity.": 25.0 } }
- Free
- 16 Downloads
-
Plugin to block specific weapons or ammo in the auto turret
To bypass the blocking, it is provided. Permission = "turretblocked.bypassblocked"
Configuration file.
{ "Prohibited weapon.": [ "lmg.m249", "rifle.l96", "rifle.m39", "rifle.ak", "rifle.lr300", "rifle.bolt", "rifle.semiauto" ], "Prohibited ammunition.": [ "ammo.rifle.explosive", "ammo.rifle.incendiary", "ammo.rifle.hv", "ammo.rifle" ] }
- Free
- 4 Downloads
-
This plugin allows NPC to not only deal damage to the on hit player, but also reduce the durability of equipped armor.
Currently, the plugin randomly selects from the available equipped armor what has durability and reduces this value when it hits the player.
The perfect plugin for Hardcore servers to keep players from stockpiling a lot of items.
The plugin only processes items that have a durability scale.
Reduces armor durability for each item that is listed in the config file.
Permission, for the plugin to work = "armornotforever.use";
Permission, armor will take damage such as player = "armornotforever.damagetotal";
Permission, armor will take damage as you set = "armornotforever.damagemultiplier";
Permission, armor does not take damage = "armornotforever.damagebypass";
If the player has "armornotforever.damagetotal" permission.
This means the settings from the "Multiplier settings" list will not be taken into account and the armor with a probability (50/50) will be damaged such as the player receives.
If the player has "armornotforever.damagemultiplier" permission.
This means if in the settings "attire.hide.poncho": 1.0,
then the poncho has a (50/50) chance of taking 1 damage.
If the player has "armornotforever.damagebypass" permission.
This means that the player's armor will not take damage.
I also want to draw attention to the fact that if you test the plugin in god mode, then the armor will not take damage.
In the "Global settings" there is an item "Debag" by turning it on you will see in the server console what item and what damage is done to the player's armor.
Default the config file.
{ "Global settings": { "Debag": true, "Damage from (Suicide). Does not damage armor.": false, "Damage from (Bleeding). Does not damage armor.": false, "Damage from (Drowning). Does not damage armor.": false, "Damage from (Thirst). Does not damage armor.": false, "Damage from (Hunger). Does not damage armor.": false, "Damage from (Cold). Does not damage armor.": false, "Damage from (Heat). Does not damage armor.": false, "Damage from (Fall). Does not damage armor.": false, "Damage from (Radiation). Does not damage armor.": false }, "Multiplier settings": { "Item list Head (item shortname : multiplier)": { "metal.facemask": 1.0, "diving.mask": 1.0, "hat.gas.mask": 1.0, "heavy.plate.helmet": 1.0, "bucket.helmet": 1.0, "wood.armor.helmet": 1.0, "sunglasses": 1.0, "twitchsunglasses": 1.0, "riot.helmet": 1.0, "coffeecan.helmet": 1.0, "deer.skull.mask": 1.0 }, "Item list Body (item shortname : multiplier)": { "hazmatsuit": 1.0, "hazmatsuit.arcticsuit": 1.0, "hazmatsuit.nomadsuit": 1.0, "hazmatsuit.spacesuit": 1.0, "heavy.plate.jacket": 1.0, "metal.plate.torso": 1.0, "roadsign.jacket": 1.0, "bone.armor.suit": 1.0, "wood.armor.jacket": 1.0, "attire.hide.poncho": 1.0, "jumpsuit.suit": 1.0, "jumpsuit.suit.blue": 1.0, "cratecostume": 1.0, "barrelcostume": 1.0, "gloweyes": 1.0 }, "Item list Pants (item shortname : multiplier)": { "heavy.plate.pants": 1.0, "wood.armor.pants": 1.0, "roadsign.kilt": 1.0 } } }- Free
- 37 Downloads


Recently Updated
-
- 0 Downloads
- 0 Comments
-
- 8 Downloads
- 0 Comments
-
- 98 Downloads
- 0 Comments
-
- 5 Downloads
- 0 Comments
-
- 75 Downloads
- 0 Comments
-
- 8 Downloads
- 0 Comments
-
- 0 Downloads
- 0 Comments
-
- 1 Downloads
- 0 Comments
-
- 2 Downloads
- 0 Comments
-
- 1 Downloads
- 0 Comments


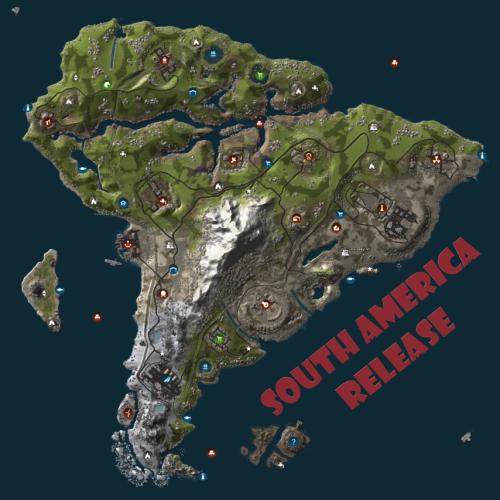
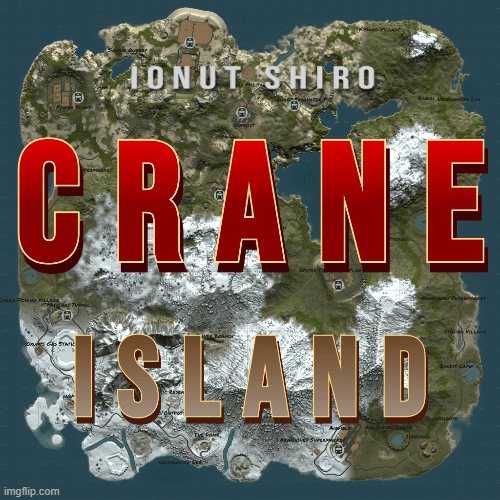
Premium Maps
-
- 1 Downloads
- 0 Comments
-
- 0 Downloads
- 0 Comments
-
- 0 Downloads
- 0 Comments
-
- 0 Downloads
- 0 Comments
-
- 1 Downloads
- 0 Comments
-
- 7 Downloads
- 0 Comments
-
- 0 Downloads
- 0 Comments
-
- 0 Downloads
- 0 Comments
-
- 2 Downloads
- 0 Comments
-
- 0 Downloads
- 0 Comments
-
- 1 Downloads
- 0 Comments
-
- 3 Downloads
- 0 Comments
-
- 0 Downloads
- 0 Comments
-
- 0 Downloads
- 0 Comments
-
- 6 Downloads
- 0 Comments
-
- 0 Downloads
- 0 Comments
-
- 0 Downloads
- 0 Comments
-
- 0 Downloads
- 0 Comments
-
- 1 Downloads
- 0 Comments
-
- 5 Downloads
- 0 Comments
-
- 0 Downloads
- 0 Comments
-
- 1 Downloads
- 0 Comments
-
- 0 Downloads
- 0 Comments
-
- 4 Downloads
- 0 Comments
-
- 1 Downloads
- 0 Comments


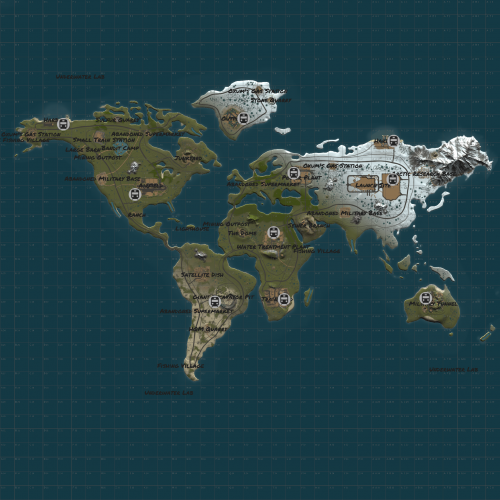
Free Maps
-
- 12 Downloads
- 0 Comments
-
- 37 Downloads
- 0 Comments
-
- 14 Downloads
- 0 Comments
-
- 10 Downloads
- 0 Comments
-
- 19 Downloads
- 0 Comments
-
- 6 Downloads
- 0 Comments
-
- 10 Downloads
- 0 Comments
-
- 14 Downloads
- 0 Comments
-
- 13 Downloads
- 0 Comments
-
- 71 Downloads
- 0 Comments
-
- 130 Downloads
- 0 Comments
-
- 101 Downloads
- 0 Comments
-
- 76 Downloads
- 0 Comments
-
- 127 Downloads
- 0 Comments
-
- 221 Downloads
- 0 Comments
-
- 212 Downloads
- 3 Comments


Premium Prefabs
-
- 8 Downloads
- 0 Comments
-
- 19 Downloads
- 0 Comments
-
- 9 Downloads
- 0 Comments
-
- 0 Downloads
- 0 Comments
-
- 6 Downloads
- 0 Comments
-
- 4 Downloads
- 0 Comments
-
- 2 Downloads
- 0 Comments
-
- 1 Downloads
- 0 Comments
-
- 1 Downloads
- 0 Comments
-
- 2 Downloads
- 0 Comments
-
- 2 Downloads
- 0 Comments
-
- 2 Downloads
- 0 Comments
-
- 4 Downloads
- 0 Comments
-
- 4 Downloads
- 0 Comments
-
- 3 Downloads
- 0 Comments
-
- 5 Downloads
- 1 Comments
-
- 1 Downloads
- 0 Comments
-
- 4 Downloads
- 0 Comments
-
- 3 Downloads
- 0 Comments
-
- 4 Downloads
- 0 Comments
-
- 4 Downloads
- 0 Comments
-
- 2 Downloads
- 0 Comments
-
- 2 Downloads
- 0 Comments
-
- 7 Downloads
- 0 Comments
-
- 1 Downloads
- 0 Comments
-
- 7 Downloads
- 0 Comments
-
- 0 Downloads
- 0 Comments


.thumb.png.303c335370198e973f88ae3dd15ee0bb.png)
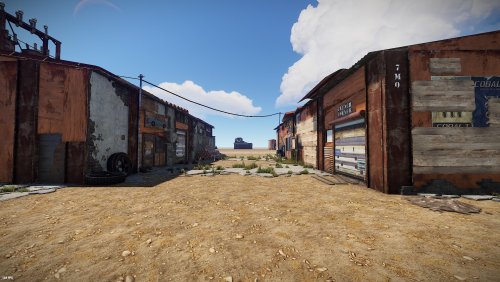
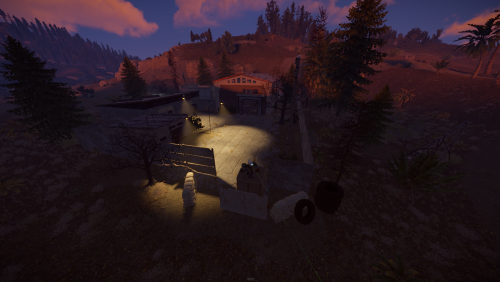
Free Prefabs
-
- 180 Downloads
- 0 Comments
-
- 121 Downloads
- 0 Comments
-
- 122 Downloads
- 0 Comments
-
- 205 Downloads
- 0 Comments
-
- 17 Downloads
- 0 Comments
-
- 164 Downloads
- 0 Comments
-
- 89 Downloads
- 0 Comments
-
- 89 Downloads
- 0 Comments
-
- 87 Downloads
- 0 Comments
-
- 145 Downloads
- 0 Comments
-
- 81 Downloads
- 0 Comments
-
- 103 Downloads
- 0 Comments
-
- 117 Downloads
- 0 Comments
-
- 43 Downloads
- 0 Comments
-
- 74 Downloads
- 0 Comments
-
- 274 Downloads
- 0 Comments
-
- 111 Downloads
- 0 Comments
-
- 55 Downloads
- 0 Comments
-
- 20 Downloads
- 0 Comments
-
- 72 Downloads
- 0 Comments
-
- 49 Downloads
- 0 Comments
-
- 64 Downloads
- 0 Comments
-
- 53 Downloads
- 0 Comments
-
- 169 Downloads
- 0 Comments
-
- 691 Downloads
- 0 Comments
-
- 46 Downloads
- 0 Comments
-
- 94 Downloads
- 0 Comments


.thumb.png.b54b7cb61af352c215aa5c36f9a2646e.png)


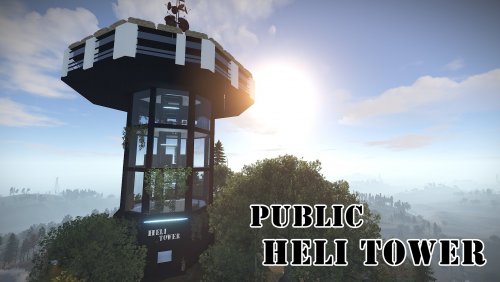
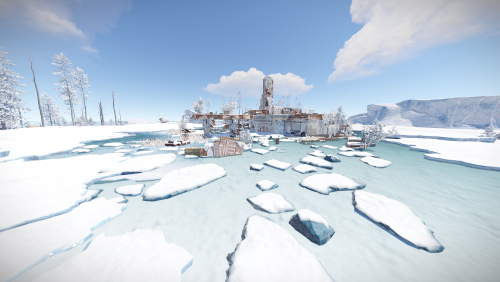
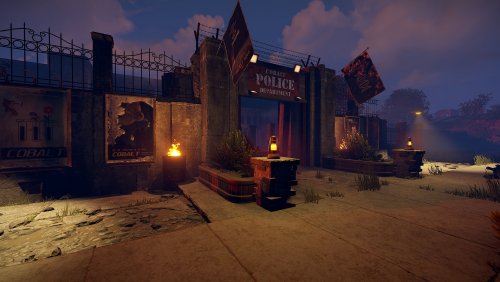
Premium Monuments
-
- 9 Downloads
- 0 Comments
-
- 0 Downloads
- 0 Comments
-
- 2 Downloads
- 0 Comments
-
- 0 Downloads
- 0 Comments
-
- 4 Downloads
- 0 Comments
-
- 7 Downloads
- 0 Comments
-
- 2 Downloads
- 0 Comments
-
- 2 Downloads
- 0 Comments
-
- 3 Downloads
- 1 Comments
-
- 0 Downloads
- 0 Comments
-
- 12 Downloads
- 0 Comments
-
- 4 Downloads
- 0 Comments
-
- 3 Downloads
- 0 Comments
-
- 3 Downloads
- 0 Comments
-
- 5 Downloads
- 0 Comments
-
- 1 Downloads
- 0 Comments
-
- 1 Downloads
- 0 Comments
-
- 2 Downloads
- 0 Comments
-
- 0 Downloads
- 0 Comments
-
- 3 Downloads
- 0 Comments
-
- 6 Downloads
- 0 Comments
-
- 2 Downloads
- 0 Comments
-
- 3 Downloads
- 0 Comments
-
- 2 Downloads
- 0 Comments
-
- 0 Downloads
- 0 Comments
-
- 5 Downloads
- 0 Comments
-
- 2 Downloads
- 0 Comments
-
- 4 Downloads
- 0 Comments


.thumb.png.0dacdb180bd562361013e3280c02d71f.png)


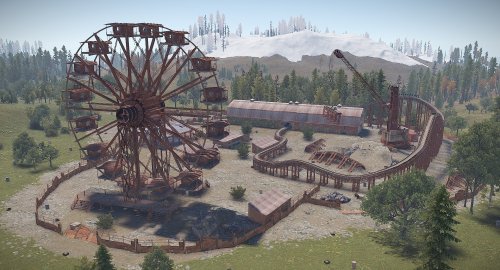
Free Monuments
-
- 47 Downloads
- 0 Comments
-
- 43 Downloads
- 0 Comments
-
- 50 Downloads
- 0 Comments
-
- 58 Downloads
- 0 Comments
-
- 35 Downloads
- 0 Comments
-
- 45 Downloads
- 0 Comments
-
- 29 Downloads
- 0 Comments
-
- 50 Downloads
- 0 Comments
-
- 47 Downloads
- 0 Comments
-
- 45 Downloads
- 0 Comments
-
- 68 Downloads
- 0 Comments
-
- 68 Downloads
- 0 Comments
-
- 39 Downloads
- 0 Comments
-
- 47 Downloads
- 0 Comments
-
- 40 Downloads
- 0 Comments
-
- 34 Downloads
- 0 Comments
-
- 32 Downloads
- 0 Comments
-
- 16 Downloads
- 0 Comments
-
- 32 Downloads
- 0 Comments
-
- 16 Downloads
- 0 Comments
-
- 3 Downloads
- 0 Comments
-
- 3 Downloads
- 0 Comments
-
- 17 Downloads
- 0 Comments
-
- 3 Downloads
- 0 Comments
-
- 14 Downloads
- 0 Comments
-
- 3 Downloads
- 0 Comments