Download Statistics
- 623 Files
- 68 Comments
- 46 Reviews
-
Plugins
62 files
-
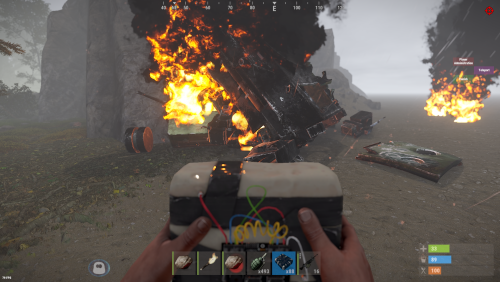
A simple plugin for your server to set the duration of heli or bradley debris fire or crates to a number of your choice!
If you have any problems you can contact me via Discord
https://discord.gg/Nem7xAwJhe
The plugin was created by ☆☆☆ AhigaO ☆☆☆
- Free
- 34 Downloads
-
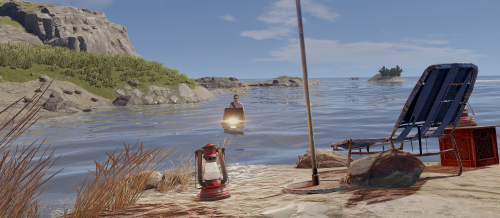
This plugin adds water bikes with customizable physics!
Commands
/waterbike - Spawns waterbike near player (requires waterbikes.spawn permission)
/waterbike_debug - show buoyancy points (admin only)
Each buoyancy point has force and size parameters
Localization
English Russian Configuration
Example WaterBikes.json
(some parts are shortened)
{ "(0) Waterbike price item short name:amount (0 - free)": { "Key": "scrap", "Value": 0 }, "(00) Spawn cooldown (in seconds)": 120, "(1) Waterbike prefab": "assets/content/vehicles/snowmobiles/tomahasnowmobile.prefab", "(2) Make all snowmobiles waterbikes": true, "(3) Allow waterbikes to drive on land": true, "(4) Spawn permission name": "waterbikes.spawn", "(5) This permission allows players to spawn waterbikes for free": "waterbikes.free", "(6) Engine thrust": 5000.0, "(7) Steering scale": 0.1, "(8) Off axis drag": 0.35, "(9) Thrust point position": { "x": -0.018, ... }, "Buoyancy points": [ { "Force": 730.0, "Position": { ... }, "Size": 1.3 }, ... ] }
API
Spawns water bike at specified position
public BaseEntity SpawnWaterbike(Vector3 position, Quaternion rotation)
- $16.99
-
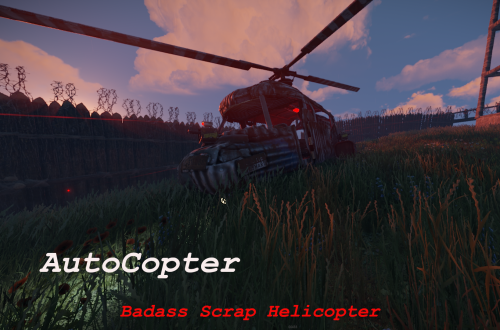
AutoCopter brings you all the tools needed to survive the Rust Apocalypse while flying in your private helicopter.
Features
Customizable Health Points
Customizable upgrade costs
Fancy extra light in the back
2 turrets on top of fuel tanks and 1 in front of the helicopter
Destroying or crashing the scrap helicopter will refund all items on ground including weapons and ammo.
Chat Commands
/upautocopter -> Will upgrade your owned Scrap transport helicopter with turrets and light
Configuration
The settings and options can be configured in the AutoCopter file under the config directory. The use of an editor and validator is recommended to avoid formatting issues and syntax errors.
{ "UpgradeCost": 4000, "HeliConfig": { "MaxHealth": 4000.0 } }
- $5
- 11 Downloads
-
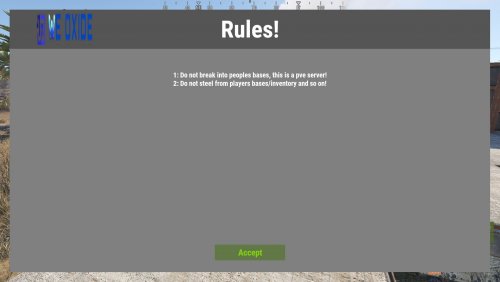
Simple and highly customizable UI, Show your players the rules when they first connect to the server!
Text Styling: Yes u can combine them!
<color=red>This changes the text color to red!</color> <b>This makes text bold!</b> <i>This makes text italic!</i> <size=20>This changes the text size to 20!</size> Commands:
/rules - shows the rules! Configuration:
{ "Text": [ "1: Do not break into peoples bases, this is a pve server!", "2: Do not steel from players bases/inventory and so on!" ], "UI": { "MainPanel": { "BackgroundColor": "0.5 0.5 0.5 1", "Size": { "AnchorMin": "0 0", "AnchorMax": "1 1", "OffsetMin": "25 25", "OffsetMax": "-25 -25" } }, "Header": { "Text": "Rules!", "FontSize": 60, "FontColor": "1 1 1 1", "BackgroundColor": "0.33 0.33 0.33 1", "Size": { "AnchorMin": "0 1", "AnchorMax": "1 1", "OffsetMin": "0 -100", "OffsetMax": "0 0" }, "Image": { "Shown": true, "ImageURL": "https://weoxide.net/uploads/monthly_2022_02/713574979_WEOXIDE_basic-file-1022200x106.png.160179787166532ce1a2b0924939fb25.png", "Size": { "AnchorMin": "0 0.5", "AnchorMax": "0 0.5", "OffsetMin": "69 -40", "OffsetMax": "211 40" } } }, "Rules": { "FontSize": 18, "FontColor": "1 1 1 1", "Size": { "AnchorMin": "0 0", "AnchorMax": "1 1", "OffsetMin": "35 70", "OffsetMax": "-35 -135" } }, "AcceptButton": { "Text": "Accept", "TextColor": "0.511 0.837 0.021 1", "TextSize": 22, "BackgroundColor": "0.3921569 0.4705882 0.2745098 1", "Size": { "AnchorMin": "0.5 0", "AnchorMax": "0.5 0", "OffsetMin": "-90 30", "OffsetMax": "90 70" } } } }
- $10
- 3 Downloads
-
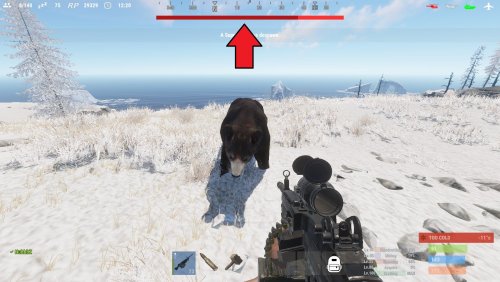
See your targets health with a nice HUD. With 4 customizable styles, change it up how ever you would like it to be, you can change the texts format, colors, etc!
Note:
if none of the styles suit you, you can always ask me to make a new one, just give me a rough sketch and I will make it!
With an internal whitelist you can choose what entities the HUD will trigger on "shortprefabname"!
"ActiveTargetDuration" is the length the HUD will be shown for when you attack a target, the length is reset if you attack a target again!
TextFormat {0} = target name, {1} = target current health, {2} = target max health
By default, the lang file is set to show the targets display name, and is set to null in the file. You can change from null to anything you want that entity to be shown as, for example "chicken": "Mr. Pecker!"
Styles:
top detailed
top thin
hotbar detailed
hotbar thin
Permission:
targethealthhud.use
Config:
{ "Style": "top detailed", "TextFormat": "{0} {1}/{2} HP", "ActiveTargetDuration": 60, "Whitelist": [ "npc_bandit_guard", "scientistnpc_ch47_gunner", "scientistnpc_oilrig", "scientistnpc_excavator", "scientistnpc_junkpile_pistol", "scientistnpc_roam", "scientistnpc_roamtethhered", "scientistnpc_patrol", "scientistnpc_peacekeeper", "scientistnpc_heavy", "scientistnpc_full_pistol", "scientistnpc_full_any", "scientistnpc_full_mp5", "scientistnpc_full_lr300", "scientistnpc_full_shotgun", "scientistnpc_cargo", "scientistnpc_cargo_turret_any", "scientistnpc_cargo_turret_lr300", "npc_underwaterdweller", "npc_tunneldweller", "patrolhelicopter", "bradleyapc", "simpleshark", "bear", "boar", "chicken", "stag", "wolf" ], "UI General": { "TextColor": "1 1 1 1", "PrimaryColor": "0.7058824 0.07843138 0.07843138 1", "SecondaryColor": "1 0.1960784 0.1960784 1" }, "UI Styles": { "Top Detailed": { "AnchorMin": "0.3297916 0.9127777", "AnchorMax": "0.6683334 0.9424074" }, "Top Thin": { "AnchorMin": "0.3297916 0.9127777", "AnchorMax": "0.6683334 0.9312962" }, "Hotbar Detailed": { "AnchorMin": "0.3437505 0.1185186", "AnchorMax": "0.6406256 0.1462963" }, "Hotbar Thin": { "AnchorMin": "0.34375 0.1203704", "AnchorMax": "0.640625 0.1314815" } } }
Language:
{ "npc_bandit_guard": null, "scientistnpc_ch47_gunner": null, "scientistnpc_oilrig": null, "scientistnpc_excavator": null, "scientistnpc_junkpile_pistol": null, "scientistnpc_roam": null, "scientistnpc_roamtethhered": null, "scientistnpc_patrol": null, "scientistnpc_peacekeeper": null, "scientistnpc_heavy": null, "scientistnpc_full_pistol": null, "scientistnpc_full_any": null, "scientistnpc_full_mp5": null, "scientistnpc_full_lr300": null, "scientistnpc_full_shotgun": null, "scientistnpc_cargo": null, "scientistnpc_cargo_turret_any": null, "scientistnpc_cargo_turret_lr300": null, "npc_underwaterdweller": null, "npc_tunneldweller": null, "patrolhelicopter": null, "bradleyapc": null, "simpleshark": null, "bear": null, "boar": null, "chicken": null, "stag": null, "wolf": null }
- $10
- 12 Downloads
-
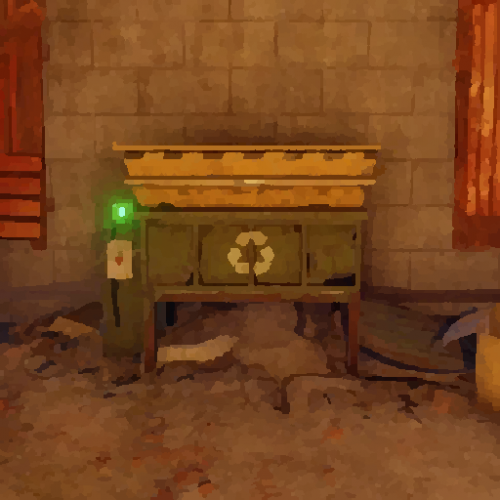
This plugin allows you to place and pickup recyclers! It is simple and perfect for your tebex shop, give the players the ability buy a recycler, without having to wait for an admin to place it!
Hit it with a hammer and its in your inventory! Simple as that!
Notes:
If you plan on changing the skin do it before giving anyone a place able recycler, as it will break the current placed recyclers! "Wont allow them to pick them up"
Permissions:
placeablerecyclers.give - permission for the command /giverecycler
placeablerecyclers.remove - permission for the command /removerecycler
Commands:
/giverecycler - Would give you a recycler!
/giverecycler [playername] - Would give the player name given a recycler!
/removerecycler - Toggleable command to enable/disable the ability to pickup a placeablerecycler!
Configuration:
{ "SkinID": 2245200021 }
Language:
{ "Given": "<color=green>A Placeable Recycler has been given to {0}!</color>", "Returned": "<color=green>You have picked up the recycler!</color>", "PlayerNotFound": "<color=red>Cannot find the player by the given ID or Name {0}!</color>" }- $5
- 6 Downloads
-
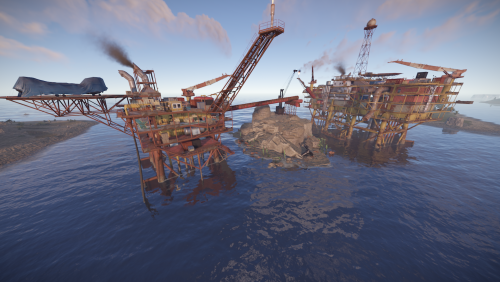
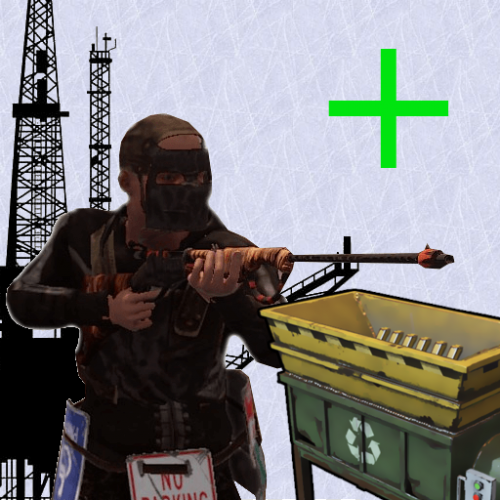
Recyclers are back on the oil rigs just like it used to be! You can customize the location of the recycler however you want!
Notes:
OilrigAI = Small Oil Rig
OilrigAI2 = Large Oil Rig
Use RustEdit to get the position and rotation information if you plan on changing its location! "place the oil rig prefab in the center of the map, set its position and rotation all to 0 and then place your recycler and get its position/rotation"
Configuration:
- $5
- 1 Downloads
-
Lock players inventory's instantly through command or permissions!
Commands:
/lock playername type
/unlock playername type
*type = "wear, main, belt"
Permissions:
inventorylock.use
inventorylock.bypass
inventorylock.main
inventorylock.belt
inventorylock.wear
Language:
- $5
-
This plugin lets you control every aspect of a FishTrap! From its percentage of catch to how often it catches! You can make fish traps 2X or 5X!
This plugin is compatible with ContinuousFishTraps!
Note:
Do not change the name of the fish in the targetWildlife!
decayDamageScale: 1 being 100% of the fishtraps health!
Weight: is like a percentage of catch, for example you have 60% chance to catch minnows!
tickRate: is for how often u want the fishtrap to catch fish!
trappedEffectRepeatRate: is how often do u want the effect that a fish has been caught to occur!
trapSuccessRate: what chance do u want the fish traps to catch fish on the first try! 1 being 100%
Example config to ignore certain bait
"ignoreBait": [
"bearmeat.cooked",
"pumpkin"
]
Configuration: "Note: The default config has the default configuration of a vanilla fish trap"
To do:
Custom loot table!
- $5
-
This plugin lets the fish traps run without stopping! Normally when using the fish traps you have to empty them out or just at least open them to reset them to catch another fish.
This plugin is compatible with FishtrapController
Permission:
continuousfishtraps.use
Configuration:
- $5
-
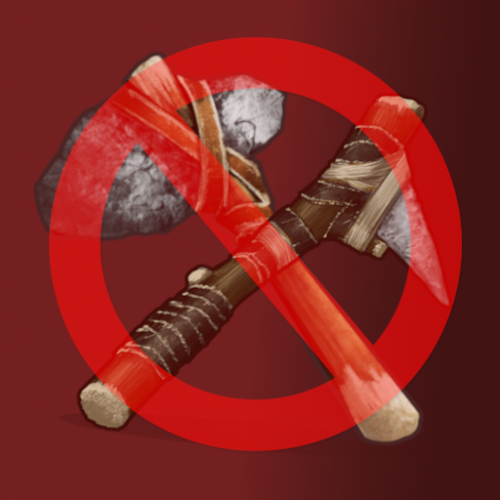
Block the use of certain tools when gathering an NPC, Player, Animal, Node, Tree, ETC! Control what tools they cannot use!
Permissions:
bettertoolblocker.bypass
Configuration:
Language:
- $5
-
You can skin items that are already placed!
Note:
To be able to use this plugin, the player first must have the permission or be in a group with the permission.
You can only skin an object that is whitelisted in the config.
Only add an items that are skinable into the whitelist!
To be able to change the skin of an object, it must be in the whitelist! And then only if you placed it, or are authorized on the TC, and if you have 'UseTeams' enabled, you can skin items placed by members from your team.
It is ideal to stand fully and look at the object directly before skinning, because the raycast ray is positioned to your head!
Permissions:
skinsight.use "Command: /skinitem"
skinsight.reset "Command: /skinreset"
skinsight.info "Command: /getskinid"
skinsight.bypass "Allows you to use the commands, bypassing the security checks!"
Commands:
/skinitem skinid
/skinreset
/getskinid
Configuration:
Language:
- $5


Recently Updated
-
- 0 Downloads
- 0 Comments
-
- 8 Downloads
- 0 Comments
-
- 98 Downloads
- 0 Comments
-
- 5 Downloads
- 0 Comments
-
- 75 Downloads
- 0 Comments
-
- 8 Downloads
- 0 Comments
-
- 0 Downloads
- 0 Comments
-
- 1 Downloads
- 0 Comments
-
- 2 Downloads
- 0 Comments
-
- 1 Downloads
- 0 Comments

Premium Maps
-
- 1 Downloads
- 0 Comments
-
- 0 Downloads
- 0 Comments
-
- 0 Downloads
- 0 Comments
-
- 0 Downloads
- 0 Comments
-
- 1 Downloads
- 0 Comments
-
- 7 Downloads
- 0 Comments
-
- 0 Downloads
- 0 Comments
-
- 0 Downloads
- 0 Comments
-
- 2 Downloads
- 0 Comments
-
- 0 Downloads
- 0 Comments
-
- 1 Downloads
- 0 Comments
-
- 3 Downloads
- 0 Comments
-
- 0 Downloads
- 0 Comments
-
- 0 Downloads
- 0 Comments
-
- 6 Downloads
- 0 Comments
-
- 0 Downloads
- 0 Comments
-
- 0 Downloads
- 0 Comments
-
- 0 Downloads
- 0 Comments
-
- 1 Downloads
- 0 Comments
-
- 5 Downloads
- 0 Comments
-
- 0 Downloads
- 0 Comments
-
- 1 Downloads
- 0 Comments
-
- 0 Downloads
- 0 Comments
-
- 4 Downloads
- 0 Comments
-
- 1 Downloads
- 0 Comments


Free Maps
-
- 12 Downloads
- 0 Comments
-
- 37 Downloads
- 0 Comments
-
- 14 Downloads
- 0 Comments
-
- 10 Downloads
- 0 Comments
-
- 19 Downloads
- 0 Comments
-
- 6 Downloads
- 0 Comments
-
- 10 Downloads
- 0 Comments
-
- 14 Downloads
- 0 Comments
-
- 13 Downloads
- 0 Comments
-
- 71 Downloads
- 0 Comments
-
- 130 Downloads
- 0 Comments
-
- 101 Downloads
- 0 Comments
-
- 76 Downloads
- 0 Comments
-
- 127 Downloads
- 0 Comments
-
- 221 Downloads
- 0 Comments
-
- 212 Downloads
- 3 Comments


Premium Prefabs
-
- 8 Downloads
- 0 Comments
-
- 19 Downloads
- 0 Comments
-
- 9 Downloads
- 0 Comments
-
- 0 Downloads
- 0 Comments
-
- 6 Downloads
- 0 Comments
-
- 4 Downloads
- 0 Comments
-
- 2 Downloads
- 0 Comments
-
- 1 Downloads
- 0 Comments
-
- 1 Downloads
- 0 Comments
-
- 2 Downloads
- 0 Comments
-
- 2 Downloads
- 0 Comments
-
- 2 Downloads
- 0 Comments
-
- 4 Downloads
- 0 Comments
-
- 4 Downloads
- 0 Comments
-
- 3 Downloads
- 0 Comments
-
- 5 Downloads
- 1 Comments
-
- 1 Downloads
- 0 Comments
-
- 4 Downloads
- 0 Comments
-
- 3 Downloads
- 0 Comments
-
- 4 Downloads
- 0 Comments
-
- 4 Downloads
- 0 Comments
-
- 2 Downloads
- 0 Comments
-
- 2 Downloads
- 0 Comments
-
- 7 Downloads
- 0 Comments
-
- 1 Downloads
- 0 Comments
-
- 7 Downloads
- 0 Comments
-
- 0 Downloads
- 0 Comments


.thumb.png.303c335370198e973f88ae3dd15ee0bb.png)
Free Prefabs
-
- 180 Downloads
- 0 Comments
-
- 121 Downloads
- 0 Comments
-
- 122 Downloads
- 0 Comments
-
- 205 Downloads
- 0 Comments
-
- 17 Downloads
- 0 Comments
-
- 164 Downloads
- 0 Comments
-
- 89 Downloads
- 0 Comments
-
- 89 Downloads
- 0 Comments
-
- 87 Downloads
- 0 Comments
-
- 145 Downloads
- 0 Comments
-
- 81 Downloads
- 0 Comments
-
- 103 Downloads
- 0 Comments
-
- 117 Downloads
- 0 Comments
-
- 43 Downloads
- 0 Comments
-
- 74 Downloads
- 0 Comments
-
- 274 Downloads
- 0 Comments
-
- 111 Downloads
- 0 Comments
-
- 55 Downloads
- 0 Comments
-
- 20 Downloads
- 0 Comments
-
- 72 Downloads
- 0 Comments
-
- 49 Downloads
- 0 Comments
-
- 64 Downloads
- 0 Comments
-
- 53 Downloads
- 0 Comments
-
- 169 Downloads
- 0 Comments
-
- 691 Downloads
- 0 Comments
-
- 46 Downloads
- 0 Comments
-
- 94 Downloads
- 0 Comments


.thumb.png.b54b7cb61af352c215aa5c36f9a2646e.png)


Premium Monuments
-
- 9 Downloads
- 0 Comments
-
- 0 Downloads
- 0 Comments
-
- 2 Downloads
- 0 Comments
-
- 0 Downloads
- 0 Comments
-
- 4 Downloads
- 0 Comments
-
- 7 Downloads
- 0 Comments
-
- 2 Downloads
- 0 Comments
-
- 2 Downloads
- 0 Comments
-
- 3 Downloads
- 1 Comments
-
- 0 Downloads
- 0 Comments
-
- 12 Downloads
- 0 Comments
-
- 4 Downloads
- 0 Comments
-
- 3 Downloads
- 0 Comments
-
- 3 Downloads
- 0 Comments
-
- 5 Downloads
- 0 Comments
-
- 1 Downloads
- 0 Comments
-
- 1 Downloads
- 0 Comments
-
- 2 Downloads
- 0 Comments
-
- 0 Downloads
- 0 Comments
-
- 3 Downloads
- 0 Comments
-
- 6 Downloads
- 0 Comments
-
- 2 Downloads
- 0 Comments
-
- 3 Downloads
- 0 Comments
-
- 2 Downloads
- 0 Comments
-
- 0 Downloads
- 0 Comments
-
- 5 Downloads
- 0 Comments
-
- 2 Downloads
- 0 Comments
-
- 4 Downloads
- 0 Comments


.thumb.png.0dacdb180bd562361013e3280c02d71f.png)


Free Monuments
-
- 47 Downloads
- 0 Comments
-
- 43 Downloads
- 0 Comments
-
- 50 Downloads
- 0 Comments
-
- 58 Downloads
- 0 Comments
-
- 35 Downloads
- 0 Comments
-
- 45 Downloads
- 0 Comments
-
- 29 Downloads
- 0 Comments
-
- 50 Downloads
- 0 Comments
-
- 47 Downloads
- 0 Comments
-
- 45 Downloads
- 0 Comments
-
- 68 Downloads
- 0 Comments
-
- 68 Downloads
- 0 Comments
-
- 39 Downloads
- 0 Comments
-
- 47 Downloads
- 0 Comments
-
- 40 Downloads
- 0 Comments
-
- 34 Downloads
- 0 Comments
-
- 32 Downloads
- 0 Comments
-
- 16 Downloads
- 0 Comments
-
- 32 Downloads
- 0 Comments
-
- 16 Downloads
- 0 Comments
-
- 3 Downloads
- 0 Comments
-
- 3 Downloads
- 0 Comments
-
- 17 Downloads
- 0 Comments
-
- 3 Downloads
- 0 Comments
-
- 14 Downloads
- 0 Comments
-
- 3 Downloads
- 0 Comments